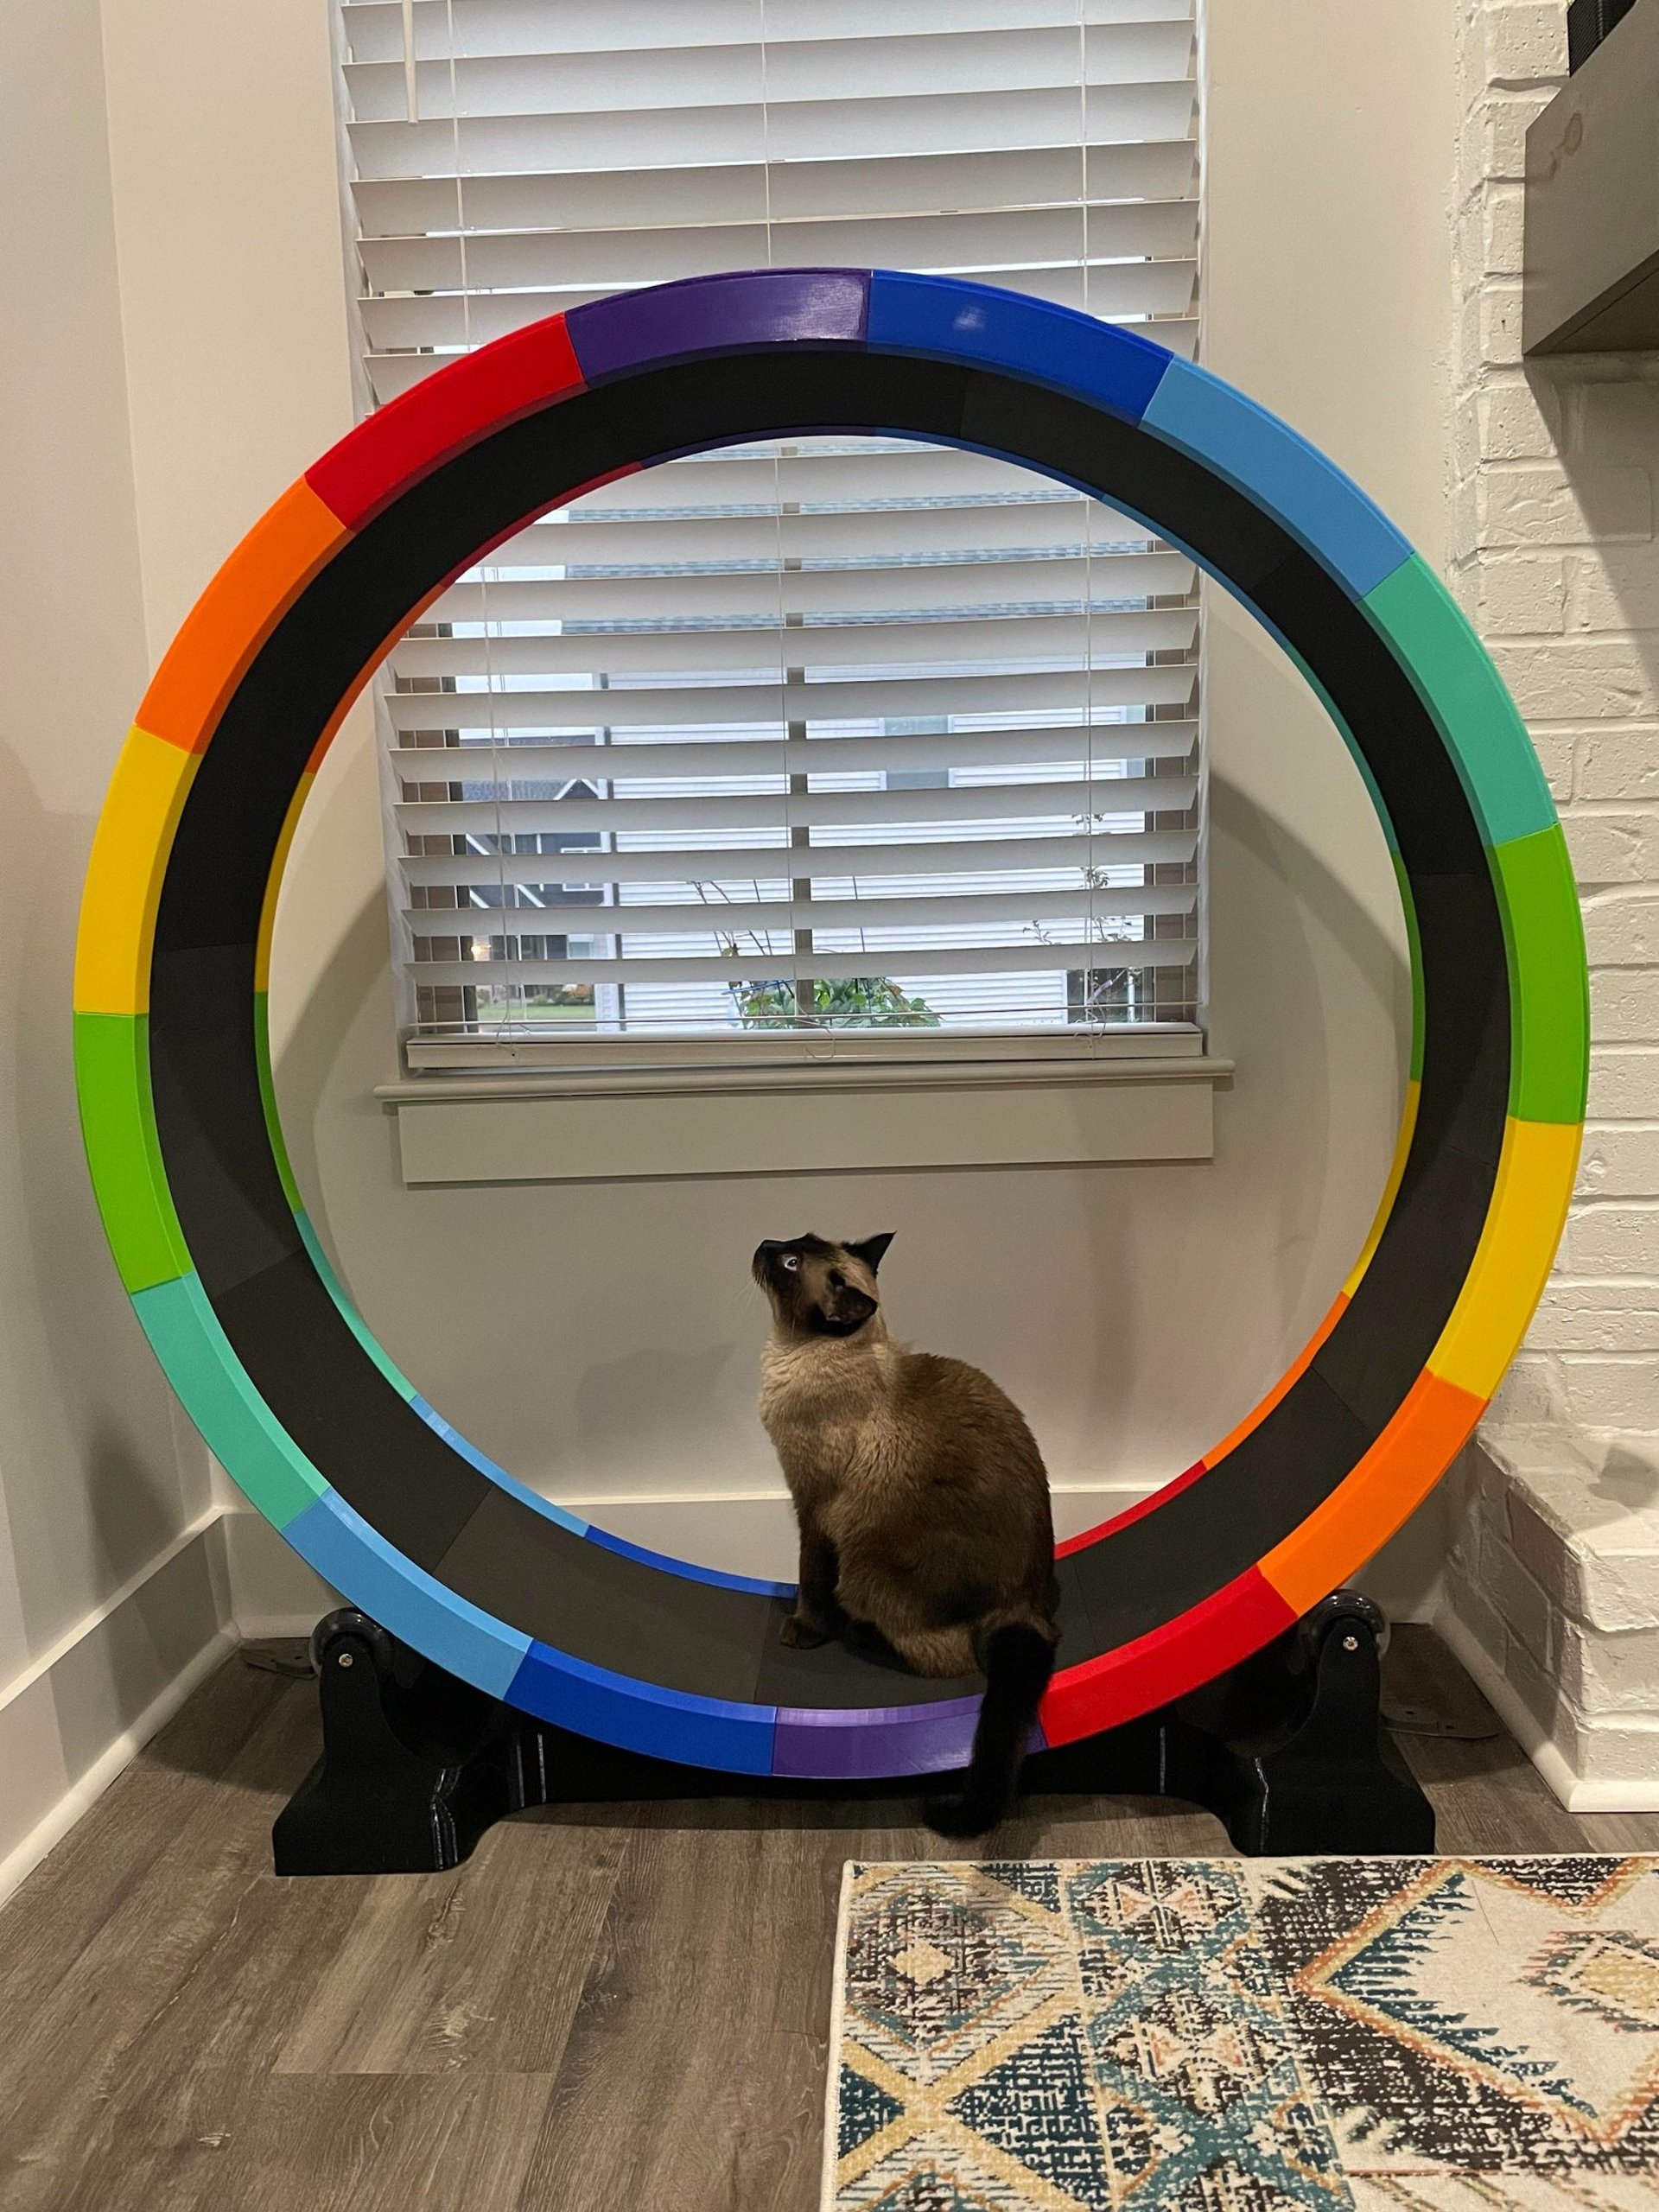
This started as a personal challenge as I, a.) Made an impulse decision to buy a 3D printer, b.) Wanted to learn Fusion 360 to make something useful, and c.) Wanted to replace my existing cat wheel. I had already purchased a cat wheel but it spun poorly, didn't have a stable base, and I hated the fact that they used fiberglass in the rails without warning people and it messed up my hands. I won't name the company, but they are the first one to show up if you Google "cat wheel". People asked to buy the STLs when I posted a video on Facebook, so I've uploaded the files on Cults3D. If you purchase my files, you agree to not sell or share them, including the printed wheel itself.
*These are digital models, you will not receive a physical wheel!
Please scroll down and read over the hardware needed. This isn't a cheap project, but you'll end up with the satisfaction of making something awesome for your amazing cat(s) and having a sturdy cat wheel. Oh, and you can make it any color you want! I can't tell you the exact cost of this. The parts outside of the filament cost me around $100 but you can certainly shop around. How much filament you will need will be determined by the settings you use. I used a lot of infill to make mine heavy; I picked a weight I wanted and adjusted the slicer until I achieved that weight. I found photos from July 2021 of the rails (with supports) and tracks sitting on a scale and they were each 162 and 163 grams, respectively. I've re-sliced the base pieces to get a weight and it came out to 4,880g, but you can make it lighter than that. Somebody who printed the wheel used a lot less infill than I did. I used 15% infill on the base corners and 10% on the three pieces that connect the corners. I used 4 walls and 6 top and bottom layers. My wheel took around 13 spools when you add it up. GST3D PLA+ was selling at $8 a spool at the time.
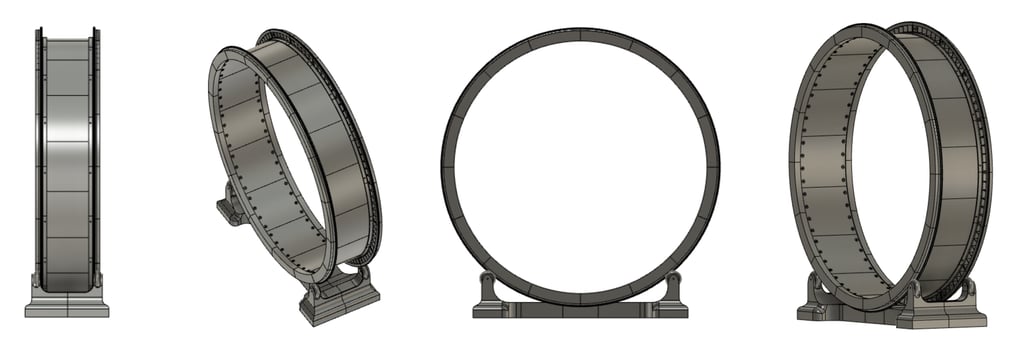
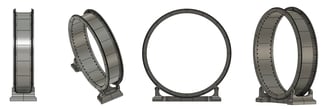
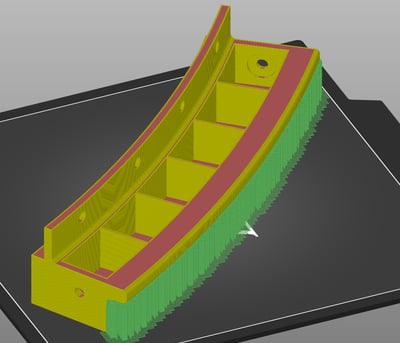
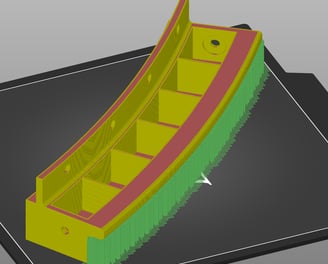
I designed this cat wheel and printed it on an Ender 3 which has a build area of 8.7 x 8.7 x 9.8" (220x220x250mm). Some of the pieces take up the entire build plate, so I do not recommend printing this on a smaller printer. You can't scale it either as the skate wheels won't fit in the base. The final wheel measures 4' wide and 4'4" tall. I use prusaslicer and designed the corners to max out my build plate.
A few years down the road, Elegoo reached out to me (technically my cats) for a collaboration with their new Centauri Carbon printer. I had been wanting to print another wheel to my the colors of my living room so I figured it would be a cool opportunity. And much faster. I was printing nice and slow on my ender 3 and the walkways were taking me 15 hours each! My Centauri Carbon prints them in 4 hours at their standard speed (not the super fast ones!) It's also a Core XY printer versus a bed slinger like the Ender 3 which feels a little more secure on the walkways. You can check it out here if you want: Elegoo Centauri Carbon 3D Printer

Big Wheel Parts
Wheel:
Rails: Print 32
Walk way: Print 16
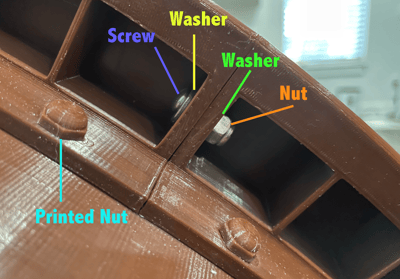
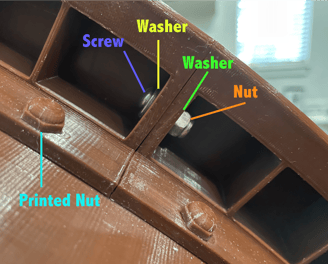
Nuts and bolts - I started by printing these but the wheel was kind of creaky, so I ended up replacing them with metal ones which quieted the wheel down a lot. I recommend this so strongly that I've debated whether I should take the printed ones out of the files on Cults 3D. (See under hardware section for details.) I was trying to build this wheel with as many printed pieces as I could to keep the cost down, but upgrading these was well worth it. The upgrade to metal hardware on the track is around $45. If you don't mind it making some noise, you can print these. Print (at least) 128 of each. I had to scale the nuts x and y to 102%. Test out one before printing them all. I printed the screws horizontally with supports so they don't snap and the nuts printed flat with the dome on top. I don't have a huge variety of wrench sizes, so I made a handle for this and will include it. You might need to scale it depending on if you need to resize the nuts. I used sequential printing in Prusaslicer to print them individually before going onto the next.
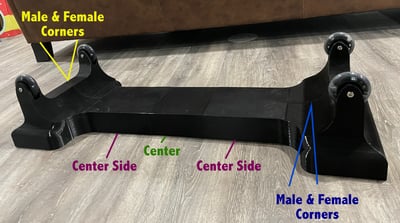
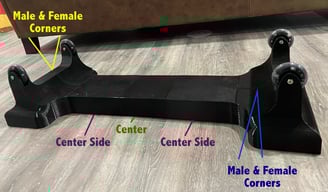
Base:
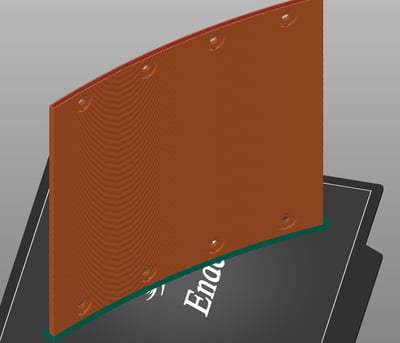
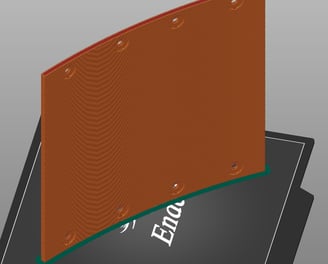
Female corner: Print 2
Male corner: Print 2
Center Side: Print 2
Center: Print 1
Hardware and components: (I'm including links to the ones I used, but you can always shop around!)
Wheel Shafts - Need 4
Used the large one (40mm) and this set came with washersSkate wheels - Need 4
Used 76mm
You should be able to use any 76x24mm wheels, smaller ones would probably work if you have some laying around. Make sure they have bearings. Linked above are the fancy light up ones I used but you can probably find another option for cheaper.Spacers - Need 4: If the skate wheels you buy don’t come with spacers, you will need to buy some.
Self adhesive foam sheets - 9X12" - Need 12
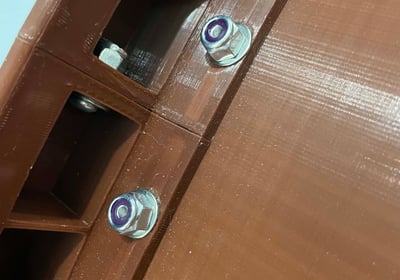
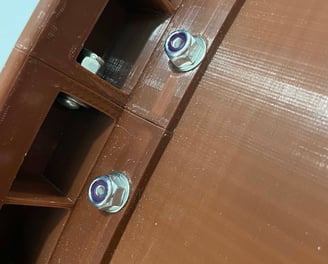
You can buy these different places but Michael's are what I used. I started with Hobby Lobby and they were falling off the next morning, so I definitely don't recommend theirs. Michael’s often has coupons online and if you are in store, you can always grab one from Retail Me Not if there isn’t one on their website. The width of these will fit in the walkway but you will need to trim the length on the last piece or two. Wait until you are at the end of sticking the sheets on before you trim it.The outside rails are connected with metal screws and nuts for safety and security. As stated above, I ended up upgrading the walkway screws from printed to metal. I’ve calculated the cost of hardware including whether you want to print the track screws or upgrade them to metal (highly recommend). These prices are from McMaster-Carr and are from July 2022 (excluding tax and shipping).
Purchase the following parts if you only want to use metal to connect the rails:
Assembly
Connect the walkway pieces to the rails with the plastic screws first because it will be harder once the metal rail pieces are tight. Offset the walkway from the rails by two holes.
Then connect all the rails with the metal fasteners. Loose to start and once you have them all in, snug them up. I used a ratchet and Allen wrench to tighten them up.
Once the wheel was put together, I put a dot of super glue under the printed nuts on the walkway, just in case. You don't need to do that if you use metal ones.

Purchase the following if you want to use metal hardware on the rails and walkway (recommended) - This option will cost you an extra $45.86
Assemble the rail hardware in this order

If you decide to print the screws for the wheel. I do not recommend using these at all if you can afford hardware.
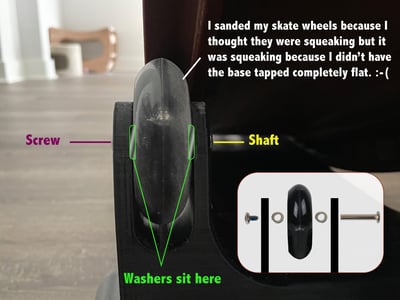
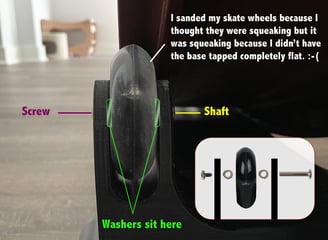
If you decide to use metal screws for the wheel, only use one washer, which will go under the nut:
Base - Print all as they will sit on the floor accept for the "center side" pieces which you can flip upside down to avoid using supports.
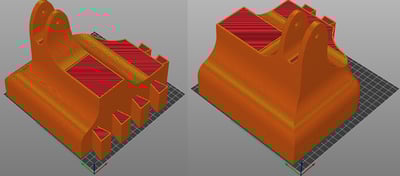
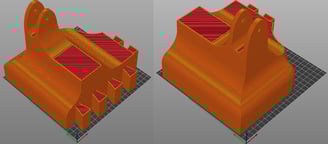
Rails - Print them with the large flat surface on the build plate. The overhang needs supports.
Walkway - Print them on their sides standing up. I recommend using a brim.
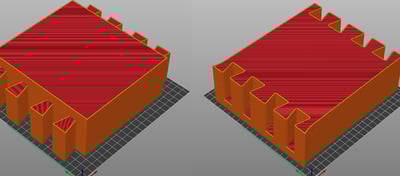
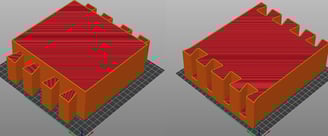
The base doesn’t need any fasteners or glue, it all fits together snugly. I made the clearance small enough to make it a tight fit. I used a rubber mallet to tap everything into place. I wanted weight in the base so the corners have 15% infill and the narrow pieces have 10%. I used 4 perimeters and 6 top and bottom layers. Might be overkill but I didn’t want to take any risks.
Roller blade wheel assembly: PUT THESE ON BEFORE ASSEMBLING THE BASE. Stick the shaft through the two holes to make sure it will go through. It needs to be a tight fit so I designed the hole to be a tight enough fit that I ended up needing to gently rock my screwdriver around in the hole to open it a little bit. Once you can get the shaft all the way through both sides: feed the shaft in just past the first plastic part, then put one washer on with the rougher part being against the skate wheel, work the skate wheel in, push the shaft through the skate wheel a little more, put the other washer in with the rough part being against the skate wheel again, push the shaft the rest of the way through. Attach the screw. It will be super tight, so you might need to use a screwdriver to gently flex the two plastic parts apart a tiny bit. I used my Ender 3 bed scraper to tap the washers into place. I was super bummed that my rollerblade wheels were squeaking once I finished my wheel but luckily I realized that the base wasn’t tapped in completely flat. Once I tapped it all together lined up, it stopped squeaking.
The female corner will need supports on the build plate.
The Center Side pieces can be printed in the orientation that it will sit and will require supports. I printed them upside down so I didn’t need supports and flipped it over during assembly.
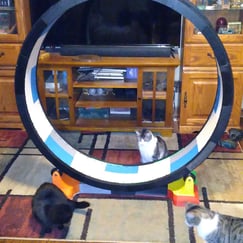
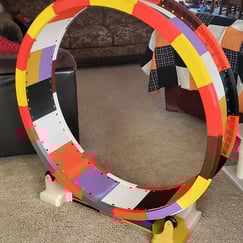
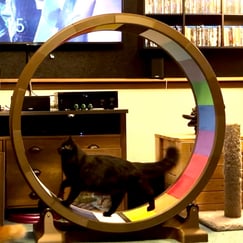
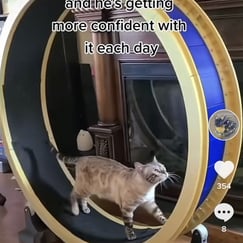
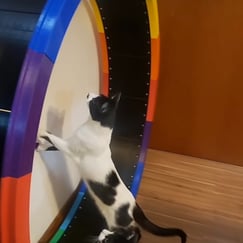
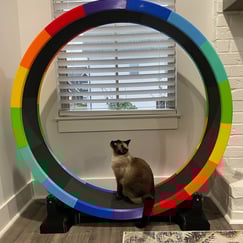
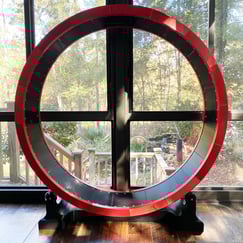
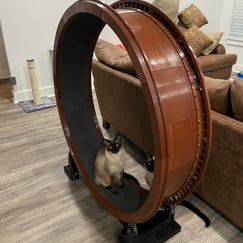
Gallery of printed wheels
If you print one, please tag me on Instagram @sia_josephine and use the hashtag #3DPrintedCatWheel
Note: Some of the links on this page are Amazon affiliate links.